25 creative wall paint ideas
By Ellie Reeves | 3rd May 2024 | 8 min read
Want to create a more inviting space? Paint is your perfect partner! Explore our range of paint ideas, from curved patterns to subtle ombre effects. We'll help you find a style and colour combo that suits you. So, grab your paintbrush (or roller) and get ready to create a space that feels like a true reflection of your personality.


1. Create colour harmony in the kitchen
Extend your wall mural onto your kitchen furniture for a real showstopping effect. In this stylish kitchen, the curved design wall mural continues onto the cabinets and dining table, tying the whole space together in one bold statement. Talk about a conversation starter at your next dinner party!
Image credit: Dulux - www.dulux.co.uk


2. B&Q loves: Colour drenching
Colour drenching is a paint trend that keeps growing in popularity – and we’re totally here for it. Paint your walls, ceiling, doors, trims, coving, and even your radiators all in the same shade. A bold move, we know! Colour drenching isn't for the faint of heart, but done right, it's pure magic. Watch our video below to learn more about the art of colour drenching, and discover how to recreate the look in your own home.
What is colour drenching?
Colour drenching is a popular colour technique which can totally transform your space. It involves saturating a room with often a single dominant colour and avoids those traditional white ceilings and trims which can create harsh lines, and strong contrasts. You can decide for yourself how far to take it; paint the radiator, upcycle existing furniture, or give your shelving a new lease of life. You may choose to use a darker tone to create a cosy feeling in a room made for relaxing. A light or mid shade can make a room feel bigger and airier, by blurring the line where the walls and ceilings meet and can work well in smaller rooms like hallways to create the illusion of space.
Remove furniture and prep the area
Let’s get started by removing all items of furniture. Remove everything from the walls including shelves, picture hooks and screws. You may choose to isolate and remove any radiators within the room for the ease of painting at this point. Then get those dust sheets down and fill any cracks you find with an appropriate filler. Lightly sand the skirting, the door frame and the door if it’s solid wood, or a gloss surface. Sanding helps to smooth your walls out and means your paint will stick much better. Use a sanding block and work your way around the wall in a circular motion to remove and smooth blemishes. For large spaces consider using an electric handheld sander to speed up the process. But don’t forget your safety gear. If the room you're painting has stairs like ours, use fine sandpaper to go over the surface roughly. Then make sure all surfaces are dust-free and clean by using a suitable cleaner, then wait for the surfaces to dry.
Paint types and finishes
To make the most of colour drenching your space, it’s important to use the correct type of paint and finish for the different surfaces, and with Valspar paint, we can colour match across all the different paint types and finishes you need. For this look we are using a consistent matt finish on the walls and ceiling, satin for the skirting and door frame, but a gloss on the radiator to help it pop. Satin finishes are more subtle than gloss for this colour drench effect but can still cope with knocks and scratches in this high traffic hallway area.
Calculate how much paint you need
Now let’s calculate how much paint you will need taking all surfaces into account and allowing for 2 coats. You can use the paint calculator on our website to work out what you might need, but a general rule is that 1 litre will cover around 10m2 surface.
Mask off areas to paint
Now although we are drenching, we still need to mask off areas that have different paint finishes for a nice clean transition between the surfaces, along with any lights, sockets or switches that need protecting. One of the golden rules of decorating is to start at the top and work your way down. By painting this way, you’ll avoid any drip marks ruining your newly painted skirting boards. The order should be: ceiling and coving first, then your walls, and then your skirting and wood trims, before tackling any hardware or decor elements like radiators or furniture.
Ceiling and coving
For the ceiling, we’ll be using Valspar Premium Matt Wall and Ceiling paint, a two inch angled precision brush for cutting in, and a medium-pile roller with an extension pole and paint tray. Cut in with the brush 2 inches around the edge of the ceiling and any light fixtures. And then use the roller in vertical and then horizontal strokes working back from a window. As you are painting the coving in the same colour and finish as the wall and ceiling, you don’t need to be afraid of bringing the paint right down over the edges for a seamless join, and there is no need to tape it off. Using the 2 inch brush, start in one corner, and work your way around the room. Applying additional coats as necessary.
Walls
We'll continue to use the same Valspar Premium Wall and Ceiling paint in a matt finish as we move now on to the walls. Use a 2 inch brush for cutting in around the edges, and a medium-pile roller and tray for the bulk of the walls, plus an extension pole if necessary. You can repeat with second coat after 2 hours.
Skirting boards
For the skirting boards, we’ll be using Valspar Premium Wood and Metal paint in a satin finish, and a 2 inch flat brush. Don’t forget to mask off the recently painted wall using decorator's tape designed for delicate surfaces. It’s advisable to prime the surface first for a professional finish, and we suggest using a grey primer if you are intending on using or covering a bold colour. When you’ve finished painting, remove the decorator’s tape while the paint is still wet but leave your dust sheet in place until the paint is completely dry.
Door frames and doors
For the door frames and the doors, we are also going to be using Valspar Premium Wood and Metal paint in a satin finish, and a wood primer in grey with a 1.5 inch or 2 inch brush. Use decorator's tape to protect the surrounding wall area and door hinges and wedge the door open before painting. You should prime and paint the doorframe first before moving on to the doors. Leave to dry for 2 to 4 hours before closing the door. If you removed any handles, wait for at least 24 hours before replacing them.
Radiators
For the radiator we are using Valspar Premium Wood and Metal paint in a gloss finish and a 2 inch brush. Lightly sand and clean the radiator, then use a suitable metal primer, before applying any paint. Apply two thin, even coats of your colour gloss paint, and don’t be tempted to overload the brush. Once re-affixed, wait at least 24 hours before turning the radiator back on to prevent the paint becoming tacky when warmed up.
Staircase
For the staircase, we’re using Valspar Premium Wood and Metal paint in satin and a 2 inch brush. Put down your dust sheet to protect the staircase and surrounding area. You should prime starting with the spindles first, before painting the banister and newel post. Wait for the primer to dry before following with your paint in the same order, working in long strokes to ensure the paint doesn’t accumulate in fiddly areas and if you have any intricate detailing, opt for a finer brush. Wait for the first coat to dry before applying a second. And if you really want to take your colour drenching to the next level then look at painting some frames, shelves or even some furniture using Valspar furniture paint in dead flat matt. And there you have it! a total transformation simply by using paint.


3. Turn your alcove into a feature with yellow paint
Want to add a pop of colour to your room without overwhelming the entire space? Why not create a charming feature by painting within your alcoves. In this living room, the curved alcove has been coated with a shade of sunny yellow paint – creating a wonderful background for the shelves and accessories on display.


4. Zone your kitchen space with paint
If you’re living in a studio flat, or you have an open plan kitchen and dining area – why not zone your kitchen with paint? Simply paint the wall behind your cabinets in whatever colour or shape you prefer. The lick of paint instantly tricks the eye into seeing a "division" between your kitchen and living space.
Image credit: Dulux - www.dulux.co.uk
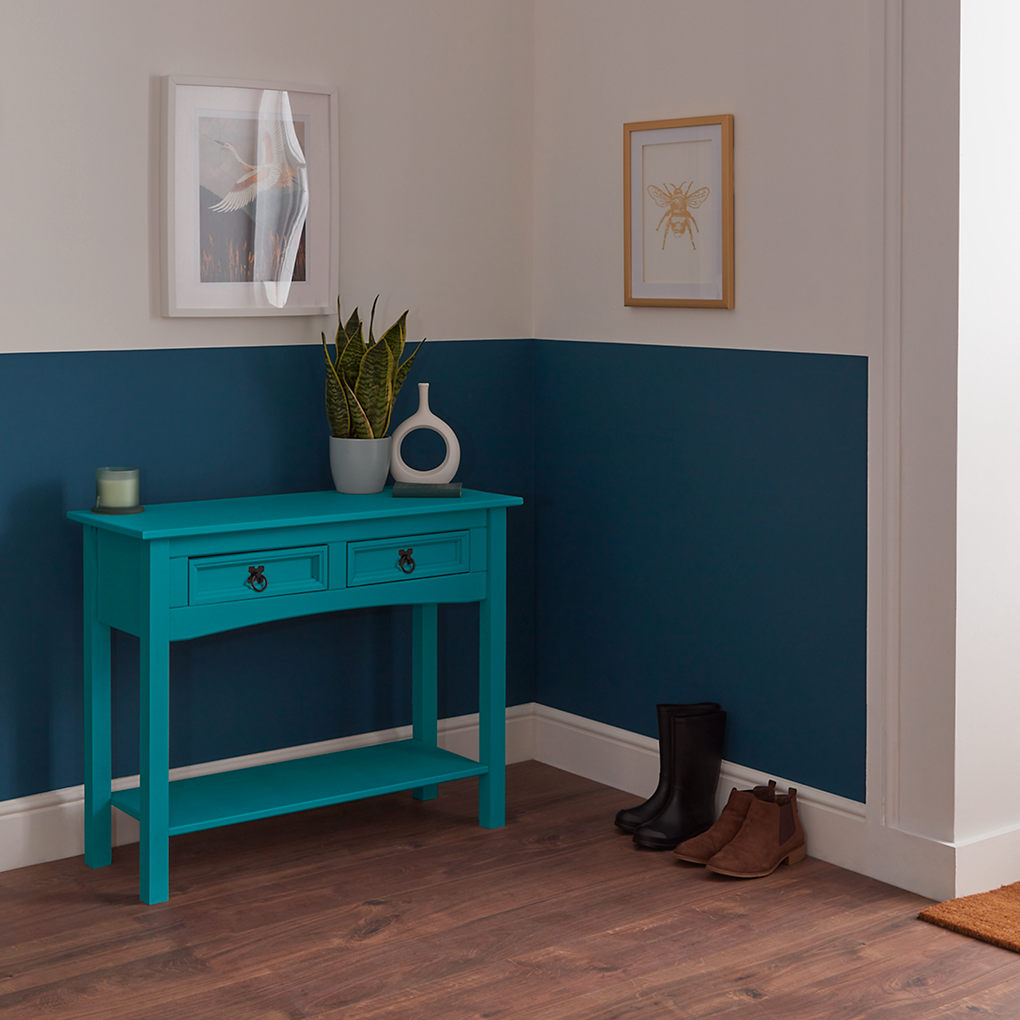

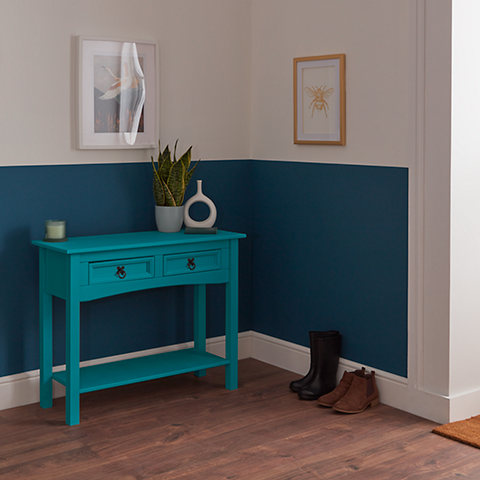
5. Paint a stylish two-tone wall
This trick lets you play with two different shades on your walls. Want to go subtle? Pick similar tones. Feeling bold? Throw in some contrasting colours, or maybe even clashing ones for a real statement piece. It all depends on the vibe you're after. This hallway, for example, rocks a deep blue on the bottom half, keeping things fresh and light with a cream colour up top. It’s the perfect way to add a bold blue to your décor – without going overboard.


6. Liven up your work space with geometric patterns
Bring some colour to your home office space with geometric paint effects. Don't be afraid to experiment with shapes. Geometric patterns are your new best friend – stripes, hexagons, maybe even some squiggles for good measure. The key is to create a design that reflects your personality. If you want a room that energizes you, go for citrus brights. If you're craving a calming space, choose cool blues and greens.
Image credit: Dulux - www.dulux.co.uk


7. Create an industrial vibe with rust effect paint
Industrial vibes with a twist? You heard that right! Embrace a whole new level of edgy-meets-cosy with rust effect paint. These walls have been coated with Craig & Rose Rust Textured effect paint. Imagine exposed brick with a hint of aged metal – that's the kind of vibe we're going for. It's raw, it's real, and it's the perfect backdrop for all your vintage finds and statement furniture.


8. B&Q loves: scallop paint effects
Soft, organic shapes are a growing trend in interior design, and the playful scallop detail is a delightful way to incorporate this aesthetic into your home. Embrace this emerging trend by painting a charming scallop detail on your walls. Perfect for a kid's room, a beach-themed bathroom, or anywhere in the home that could do with a dose of playfulness.


9. Say it loud with a bold bedroom wall mural
Create a standout bedroom mural using bold colours such as blue, orange, and a splash of turquoise. Experiment with different shapes and effects. This stylish bedroom incorporates curved arches that have been split down the middle – creating a distinctive look that it is totally unique.


10. Turn your shelves into a sunny statement piece
We absolutely love this circular wall feature. The middle shelf gets a hit of sunshine yellow, while the shelves on either side fade into lighter shades for a cool ombre effect. It's eye-catching, it's unique, and it's the perfect way to show off your favourite trinkets and treasures.
Image credit: Dulux - www.dulux.co.uk


11. Match your fireplace and coving for a cohesive look
This grand living room takes coving to the next level, and its seriously swoon-worthy. We're talking intricate details on the ceiling and coving, finished with a sleek dado rail that separates the creamy white ceiling from those pistachio green walls. The pièce de résistance, however, is the mantelpiece. Painted in the same shade as the ceiling, it integrates flawlessly into the overall design, creating a harmonious feel.
Image credit: Dulux - www.dulux.co.uk


12. Go for glamourous gold
If you want a space that screams “luxury living”, why not paint your walls with a glorious gold effect paint? We love this Antique Gold effect paint from Craig & Rose. It's the perfect way to unleash your inner design diva and create a space that feels undeniably glamorous. Shimmering gold walls will bathe your room in a warm, luxurious glow. Trust us, you won’t look back.


13. Jazz up your hallway with a painted arch mural
Add visual interest to a bare hallway with a green arch mural – it’s really easy to do and creates a stylish statement. A painted arch mural is a conversation starter, and it’s a great way to showcase your interior design prowess! Go on, give it a go. Your hallway will thank you (and your guests will be seriously impressed).
Image credit: Dulux - www.dulux.co.uk


14. Paint your doors and skirting the same
Walls? Been there, painted that. Looking to add some real personality into your space? Let's talk about doors, door frames, and skirting boards. Paint them all the same colour for a unified look or go for a contrasting shade to make those doors really pop. The possibilities are endless, and the only limit is your imagination.
Image credit: Dulux - www.dulux.co.uk


15. Make your room shimmer with glitter effect paint
Create a subtle shimmer in your room with glitter effect paint. A unique choice that gives you shimmering highlights evoking the feeling of a beautiful dream, glitter paint is one of our favourite ways to easily add a new dimension to your room. Our GoodHome feature wall glitter effect paint ranges from bold bright pinks to contemporary calming greys.


16. Elongate your hallway with clever paint effects
Paint offers more than just aesthetic appeal; it can also be used strategically to manipulate the perception of space. If you’ve got a short or cramped hallway, why not paint a large strip on the wall and ceiling? This bold design element will draw the eye upwards, visually lengthening the hallway – making it appear bigger, brighter, and less claustrophobic.
Image credit: Dulux - www.dulux.co.uk


17. Create a rustic feel with chalk wash paint
Choose chalk wash paint for a rustic, chalky texture that adds depth and character with an elegant finish. Reminiscent of limewashed walls from an exotic destination, this is an easy way to give your space some instant intrigue.


18. Play with depth and create a cool feature
Have fun with paint and create a space that is bursting with personality. This playful home office uses a cool coral pink to create a striking square feature on the walls. The vibrant colour extends to the roof window casing and shelves, tying the room together. Paint is a way to express your style. This home office does just that – a place that is creative, unique, and totally individual.
Image credit: Dulux - www.dulux.co.uk


19. Reconnect with nature with a gloriously green bedroom
Green is the ultimate relaxing colour. Think calming forests, sprawling meadows, and that first sip of a perfectly blended matcha latte. Play with deep emerald greens for a touch of drama or keep it light and airy with soft sage tones. Paint all walls the same shade or mix it up with varying tones. Read our article for more green bedroom ideas.
Recreate this look


20. Liven up your dining area with a blue feature wall
Create a vibrant focal point in your dining room with a blue feature wall. This stylish dining area features a bold colour-blocking technique using three distinct shades of blue. The effect is framed and complemented by blue cushions, tableware, and accessories, creating a cohesive and uplifting atmosphere.
Image credit: Dulux - www.dulux.co.uk


21. Complement your furniture style with paint effects
Integrate your furniture into the overall design by creating a mural that complements its style. With a hand-painted mural that mirrors the curves of the armchair, this cosy corner creates a harmonious look in your living room.
Image credit: Dulux - www.dulux.co.uk


22. Design a bold striped wall mural
Paint a stylish striped statement wall in your living room. Striped murals are the perfect way to unleash your inner design rockstar and showcase your creative side. All you need is some masking tape, and a paint brush to recreate this confident feature in your own living room.


23. Create the effect of a large headboard with paint
Love the look of a big, confident headboard? Use paint to create the same statement effect. We’re obsessed with the boldness of this room. A gorgeous curved yellow mural has been painted directly behind the bed, instantly creating the illusion of a giant, sunset-inspired headboard.
Image credit: Dulux - www.dulux.co.uk


24. Extend some of the ceiling paint onto the walls
Make your bedroom feel cosier and more relaxing by bringing some of the paint from the ceiling onto the walls. In this pink bedroom, the white paint from the ceiling gently cascades down the walls a few inches, creating a soft, inviting atmosphere. It's like the entire room is getting a big hug, instantly transforming it into the ultimate relaxation haven.


25. Experiment with metallic effect paint
Metallic effect paint is a wonderful addition to any room in the home. Whether you want to bring some opulence to your bathroom, or you want to dine surrounded by the sheen of bronze paint. This glimmering wall has been coated with Craig & Rose Tempered Bronze Metallic effect paint. Experiment with different brush strokes and shades. The beauty of metallic paint is its versatility. Want a subtle touch of glam? Paint a feature wall. Feeling bold? Go all-in and cover every surface (just maybe not the ceiling – that might be a bit much, even for you).