Renovating your bathroom
Eight simple steps to a new bathroom
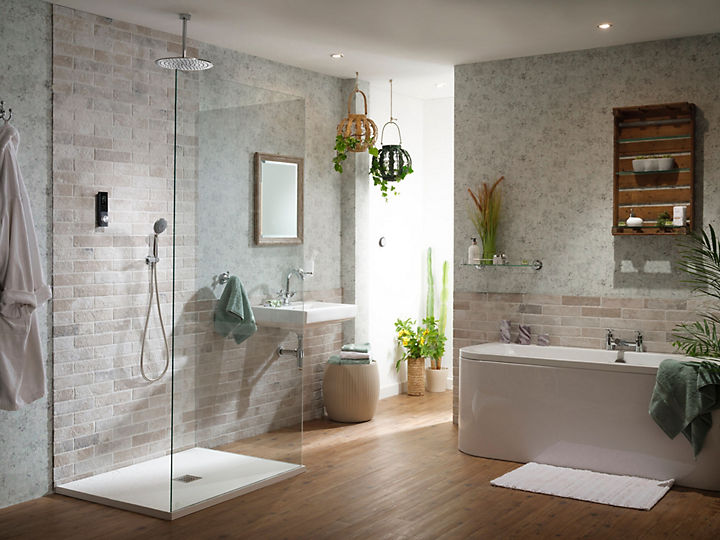
Your bathroom plays a unique role in your house. As an oasis of peace, it should be soothing, but as a functional space, it must be practical. That's why it's worth taking the plunge and building your own bathroom, just the way you want it. Renovating your bathroom can look like quite a challenge. So we’ve broken the job down into simple steps that you can tackle with confidence.

It’s important to draw plans of your existing bathroom and your future bathroom. This will help you see what changes you need to make to the electrical wiring and plumbing. Start by drawing a plan of your bathroom as it is now.
This should show:
-
The positions of the new sanitaryware and furniture you want
- The changes you need to make to the plumbing, such as any water and drain pipes you need to remove, relocate or install new
- What the plumbing system is like now, including where the hot and cold water and drain pipes are located
- What changes you need to make to the electrical wiring, such as any cables and sockets you need to remove, relocate or install new


Next, draw a plan of your future bathroom.
This drawing should show:
- The new sanitaryware, in other words shower, bath, washbasin and toilet
- The new furniture and storage units
- The new plumbing system, including hot and cold water supply points and drain pipes
- The new electrical system, including sockets, lights and electric radiators
Bathrooms contain various items connected to the electricity supply, water supply and drains. To dismantle your old bathroom safely, do the job in the following order: first remove the electrical appliances, next remove the furniture and finally remove all the items connected to the plumbing.
Electrical appliances


Most bathroom electrical appliances are for heating (like radiators or towel warmers).
Turn the power off at the main switch before you start work. Remove the radiator or towel warmer.
Fit a quick connector or terminal block to each exposed wire for maximum safety. Remove the light fittings in the same way.
If there’s not much natural light in your bathroom, leave the light fittings until last. That way you’ll have enough light to work on the other stuff.
Furniture
Now remove the furniture, including any cabinets, shelves and mirrors.


Sanitaryware
Remove the remaining fixtures: toilet, shower, bath and washbasin.
Turn the water supply off at the mains and at the supply points to each item before you start work. Leave the drains and pipes in place for the moment.
When removing the bath, remove the surround and the taps before removing the bath itself.
It’s a good idea to leave the shower until last so you can carry on using it for as long as possible!

Showers
Start by removing the shower panels, then remove the seals and detach the enclosure from the wall. Remove the shower drain fitting. Move the enclosure away from the wall just enough to access the water supply pipes and disconnect them. Remove the shower enclosure.
When removing the shower, if possible, remove the enclosure panels first, to make the next steps easier. Remove the mixer and taps, then the drain fitting. Remove any silicone seals around the tray, then detach and remove the tray itself. Lastly, remove the drain pipe.
Once you’ve removed all the fixtures and furniture, the next step is to remove the old floor and wall tiles.
Remove the floor tiles

Removing old floor tiles isn’t difficult but you do need suitable tools and protective clothing to work safely.
Follow these simple steps to remove your old floor tiles:
- Remove the skirting board.
- Find a tile that sounds loose and break it with a chisel or a drill.
- Remove the remaining tiles.
- Remove any remaining grout and adhesive.
- Remove any rubble and clean the floor.
Remove the wall tiles
Removing wall tiles is basically the same as removing floor tiles.
Depending on how you want to lay out your new bathroom, you may need to modify the plumbing. Here’s a list of possible changes:
- Moving or eliminating drainage points
- Moving or eliminating water supply points
- Making new drainage channels
Important! Take care with pipe diameters. Supplies and drains have different requirements. So you can’t re-use the old pipes if you replace a washbasin with a toilet, for example.
Water supplies


Turn off the water supply at the mains. Remove the supply pipes you don’t need any more using a multi-purpose tool. Refer to your plans and install whatever new supply pipes you need. Always use suitable tools and materials.
Follow standard pipe-laying practice. In vertical piping, the cold pipe goes on the right and the hot one goes on the left. In horizontal piping, the cold pipe goes underneath and the hot one goes on top.
Waste water drains
Refer to your plans and work out exactly where you need to install new drains. To remove or relocate old drain pipes, use a PVC pipe cutter to get rid of the pipes and fittings you don’t need any more. Assemble your new PVC pipes and fittings to make your new drainage system.


Drainage channels
Turn off the water supply at the mains. Remove the supply pipes you don’t need any more using a multi-purpose tool. Refer to your plans and install whatever new supply pipes you need. Always use suitable tools and materials.
Follow standard pipe-laying practice. In vertical piping, the cold pipe goes on the right and the hot one goes on the left. In horizontal piping, the cold pipe goes underneath and the hot one goes on top.
Depending on the layout of your new bathroom, you may have to re-route the electrical wiring.
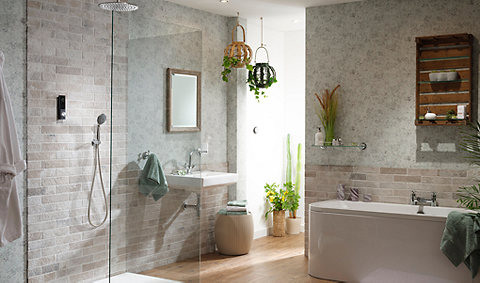
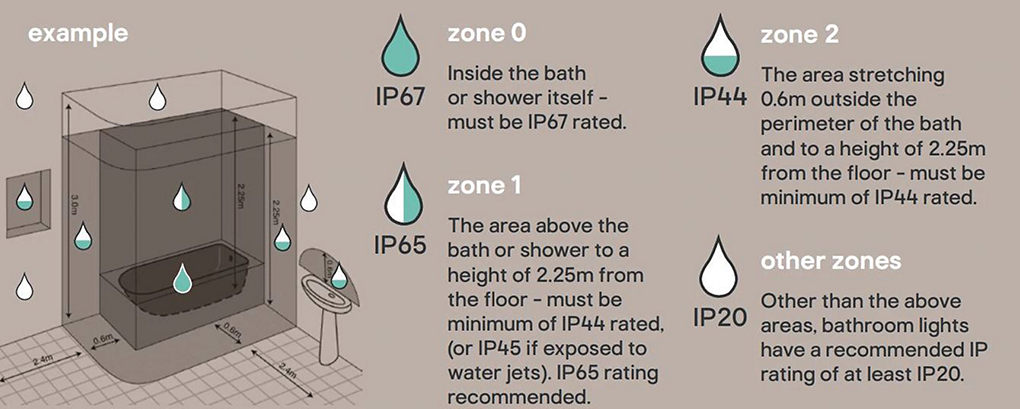
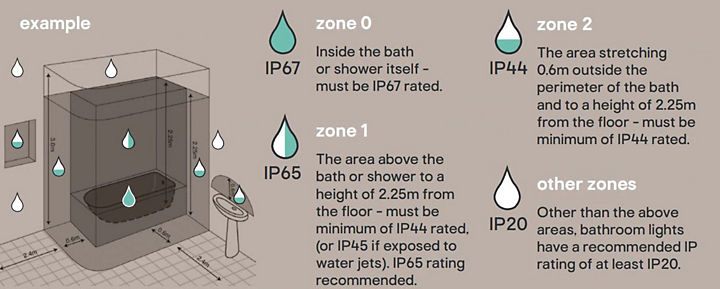
Bathroom electrical standards
Bathroom electrical wiring has special requirements and needs to be installed with care. Make sure you choose electrical appliances with the right protection (IP) rating for the zone you plan to install them in (zone 1, zone 2, elsewhere).
Modifying existing electrical wiring
Before you fit new sockets or replace old ones, it’s a good idea to check the condition of the existing electrical wiring and ask yourself a few key questions:
- Does the system have a circuit breaker?
- Does the system have an earth connection?
- Are there any bare wires?
Important!
When renovating a bathroom, always check the condition of the wiring and sockets you intend to leave in place. Old and new sections of the electrical system must both conform to the relevant standards. Once you’re satisfied, you can adapt the circuit and move the cables as you need, to create new sockets, switches and light fittings.
For your own safety always disconnect the power at the mains before starting work on the electrical system.
It’s always best to renovate your walls before you do the floor. That way you won’t damage your newly laid floor coverings.
Choosing wall coverings


Not all types of wall covering are suitable for use in the bathroom. The materials you choose have to withstand high humidity and water splashes. Basically, the choice is between waterproof paint and wall tile.
You’ll need to prepare your walls differently depending on whether you’re going to paint them or tile them. Adhesive and tiles will cover up slightly uneven surfaces, but if you’re painting, you need a perfect, unblemished surface.
You need to prep your walls to a higher standard for painting, but once that’s done, painting is a lot easier than tiling. To make sure you get a long-lasting finish, choose a paint that’s specially formulated for bathrooms, because then it will withstand humidity.
To tile your walls properly, you’ll need to do the job in several steps, using suitable tools and materials (tile cutter, adhesive spreader, grinder, adhesive, grout, etc.).
Finish the floor before you start bringing in the furniture. Ceramic tile is the most popular choice of material, but you can use other floor coverings in the bathroom.


Certain things have to be installed before you lay your floor. Drains for walk-in showers and low-profile trays are one example.
All floor coverings need to be laid on a solid, flat and clean floor surface. Depending on your choice of covering, you may also need to apply a levelling compound. If you opt for ceramic tiles or vinyl, you may need to prepare the floor first.
Once you’ve prepared your floor properly, you can lay the covering. Here we describe how to lay ceramic tile, but you can choose a different type of covering if you want.
Once the floor is laid and dry, you can install the various items that need to be connected to the water supplies and drains.
Shower kits and columns

Taps, fixed shower heads, hand-held shower heads and riser rails: you can choose from a vast range of individual items, kits and fully equipped columns. The column is the most complete option and may even include a hydromassage function with water jets.
You can leave your panels open to create a practical and stylish walk-in shower. Alternatively, you can close your shower with a sliding, pivoting, swinging or folding door – whatever’s best for the layout of your bathroom.
Floor-mounted and wall-hung toilets
Toilets come in classic, floor-mounted versions and wall-hung models. Wall-hung models look great once they’re in place, but they’re harder to install because they need a support frame.

Bathtubs
Bathtubs are available in various shapes to suit all bathroom layouts: rectangular for simpler bathrooms, corner if you need more space and island for large bathrooms.
You can even get hydromassage baths with powerful water jets for a real touch of luxury.
Once you’ve connected all the sanitaryware, turn on the water supply and check for leaks. Also check that the drains work.
Vanity units
You can install either a single-basin or double-basin vanity unit, depending on the design of your new bathroom and how much space you’ve got. Your basins can be built-in or countertop, and your vanity unit can be wall-hung or floor-standing, in pretty much any width you like.
Towel warmers

A must-have in any bathroom, towel warmers not only hold and dry your towels but also help heat your bathroom.
They’re compact, so they fit into all types of bathroom, and they come in a range of styles to match your interior design.
Light fittings

You can light your bathroom with wall lamps, ceiling lights or recessed spotlights.
Always choose a protection (IP) rating that’s compatible with the bathroom zone you plan to fit the light in. For example, you can fit IP 65 extra-low voltage spotlights even above your shower.
For your own safety
Always switch off the mains power before doing any electrical work. When installing new appliances, always follow the manufacturer’s instructions to connect them up.
Our installation service makes it even easier to bring your dream bathroom to life. We work with approved installers to coordinate your project from start to finish.
As well as fitting your design to your specification, our installers can complete the finishing touches to save you the hassle.
We provide a 2-year workmanship guarantee in addition to any product guarantees. We hope you’ll never need to use our guarantees, but peace of mind is always a good thing to have. Plus, our range of flexible payment and finance options means you can find a plan to suit you.
Find out more about our installation service and book a free planning appointment to get started.