How to add an external power supply
We'll show you how to install an outdoor socket with RCD
If you regularly use electrical equipment outdoors, such as a lawnmower or hedge trimmer, an external power point will make life easier and safer. Importantly, it should feature a residual current device (RCD) that will help to protect you from the risk of fatal electric shock.
Remember that if you're planning to make changes to a power or lighting circuit outdoors, you have to let your local authority's Building Control Department know first. Your modifications must comply with the latest IEE Wiring Regulations. New or replacement cables or sockets may also need RCD protection and be aware that if your circuit supplies power to a hot tub or swimming pool, additional regulations apply.
For your safety, electrical products must be installed in accordance with local Building Regulations. If in any doubt, or where required by the law, consult a competent person who is registered with an electrical self-certification scheme. Further information is available online or from your Local Authority.
It is essential that any sockets or switches installed out of doors have a suitable IP rating (to ensure that they are weatherproof) and do not leave any cables exposed.
RCD - a life saver A residual current device (commonly known as an RCD) is a fast-acting, safety trip switch that reduces the risk of a fatal electric shock. It does this by cutting off the power within a split second as soon as it detects an earth leakage fault. If you use any portable electrical appliances outdoors, they must be protected by a 30mA RCD. The latest IEE Wiring Regulations also state that a new socket - indoors or out - can only be wired into an RCD-protected circuit. And if you use an existing indoor socket to power appliances outdoors and it doesn't have RCD protection, you'll have to use a plug-in RCD.
You can wire an external socket in the same manner as a normal spur, by running the cable from a socket or junction box on a main ring circuit (via a switched connection unit) and mounting the socket on an external wall. Ensure your circuit has RCD protection, and that you use appropriate weatherproof outdoor fittings.
Your socket must have a weatherproof cover to protect it when you're not using it, as well as a surface mounting box with seals to stop moisture from getting in. Some types of socket even have weatherproof covers that will protect it whilst it's in use. Whatever type of socket you choose, it is better to site your socket in a sheltered spot where it won't be exposed to the full force of the weather.
Easy living
If you're planning to power outdoor lights, pond pumps or water features from your new socket, choose one with remote control on/off switching. You'll be able to use it from indoors, and it'll be quicker and easier to turn off the power when you don't need it - which will save you effort, energy and money.
Understand IP ratings
Electrical fittings have an IP rating to tell you what environment they can be safely used in. IP stands for 'ingress protection' and is followed by two numbers. The first tells you how easily objects or dust can get into the fitting, and the second how easily water can get in. The numbers run from 0 (or X), meaning wholly unprotected, to 6 (objects) or 8 (water) with an IP rating of IP68 meaning it is totally dust-proof and submersible. Ideally choose IP68 rated sockets for outdoor use.
Modern timber-framed buildings
You can't bore a hole for a cable through the external wall of a modern timber-framed building. This is because the interior cavity is filled with insulation material and contains a vapour barrier, which you mustn't break. However, you might be able to supply an outdoor power point from a socket in an attached garage, as long as this isn't already on a spur.
If you're fitting an outdoor socket, you'll need to make sure it's weatherproof and has purpose-designed fittings. Frost damages cable insulation, so you should ensure that no cable is left exposed to the elements at any point. Fit the outdoor socket first, then complete the job by wiring the cable into a suitable socket or junction box on a main circuit with RCD protection, as you would for a spur.


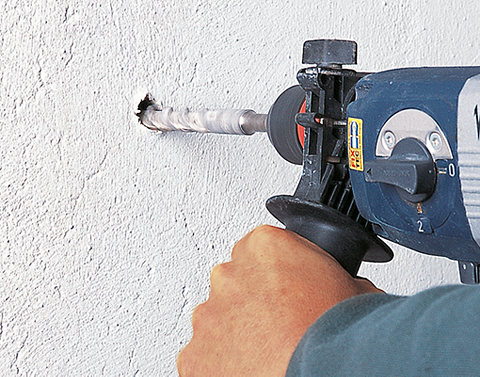
Step 1
Start by checking your inside wall for hidden pipes or cables. Then drill from the outside, about 50mm below the socket position, using a heavy-duty hammer-action drill and 16mm gauge bit. Angle your drill slightly upwards as you work.
Top tip - running cable through an outside wall
If you angle your drill bit slightly upwards this will stop rainwater from running through and damaging the plaster inside. A normal cavity wall is about 275mm thick, excluding the interior plaster. Mark this depth on the drill bit with tape. As the hole approaches that depth, go slowly to reduce damage to the plasterwork as the drill bit breaks through. Sticking masking tape over the interior plaster before you drill will also help you do this. And if you line the hole with 16mm plastic conduit, you'll protect the cable and make everything easier to install.
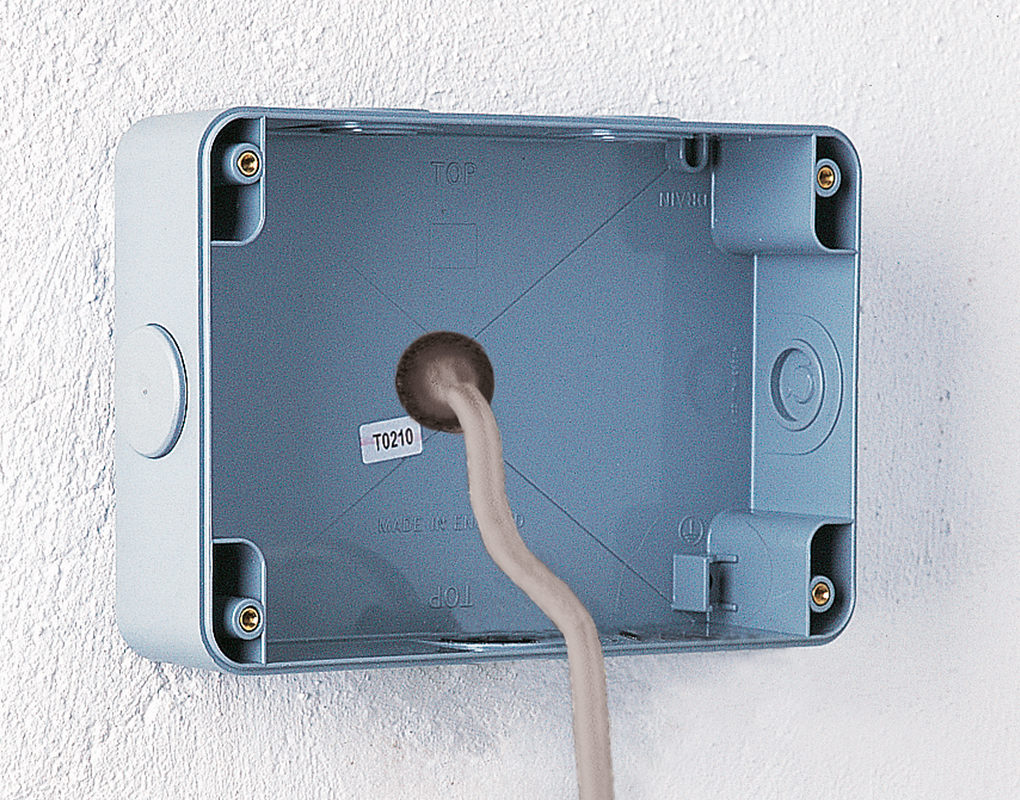

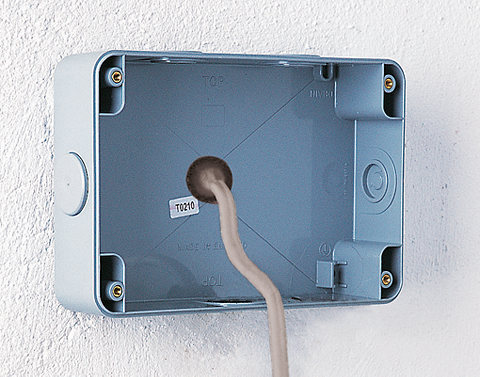
Step 2
Feed the conduit and cable through the wall. Leave the conduit protruding, and enough cable to connect to the new socket. After that, remove the central knock-out from the box and fit a weatherproof grommet. Hold the mounting box in place (using a spirit level to make sure it's horizontal) and mark the fixing holes. Next, drill these holes with a masonry bit and fit plastic wall plugs. Feed the cable and the end of the conduit through the grommet into the box, and fix the box to the wall with round-headed screws. A dab of silicone sealant behind each screw head will give you a watertight seal. Then run a bead of silicone sealant between the wall and outer edge of the box.


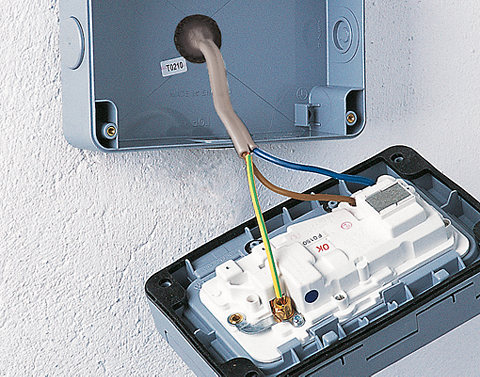
Step 3
Strip off the outer sheathing of the cable to expose the ends of the cores, and slip a length of green/yellow sleeving over them. Connect the cores to the appropriate terminals, making sure the screws are tight. Then screw the faceplate to the mounting box.